

Fix “No voice found”
1
Check which microphone is active
The active input device shows in the top-right of every settings pane. If Superwhisper is listening to the wrong device, such as a disconnected headset or a muted external microphone, switch it there or set Use system default.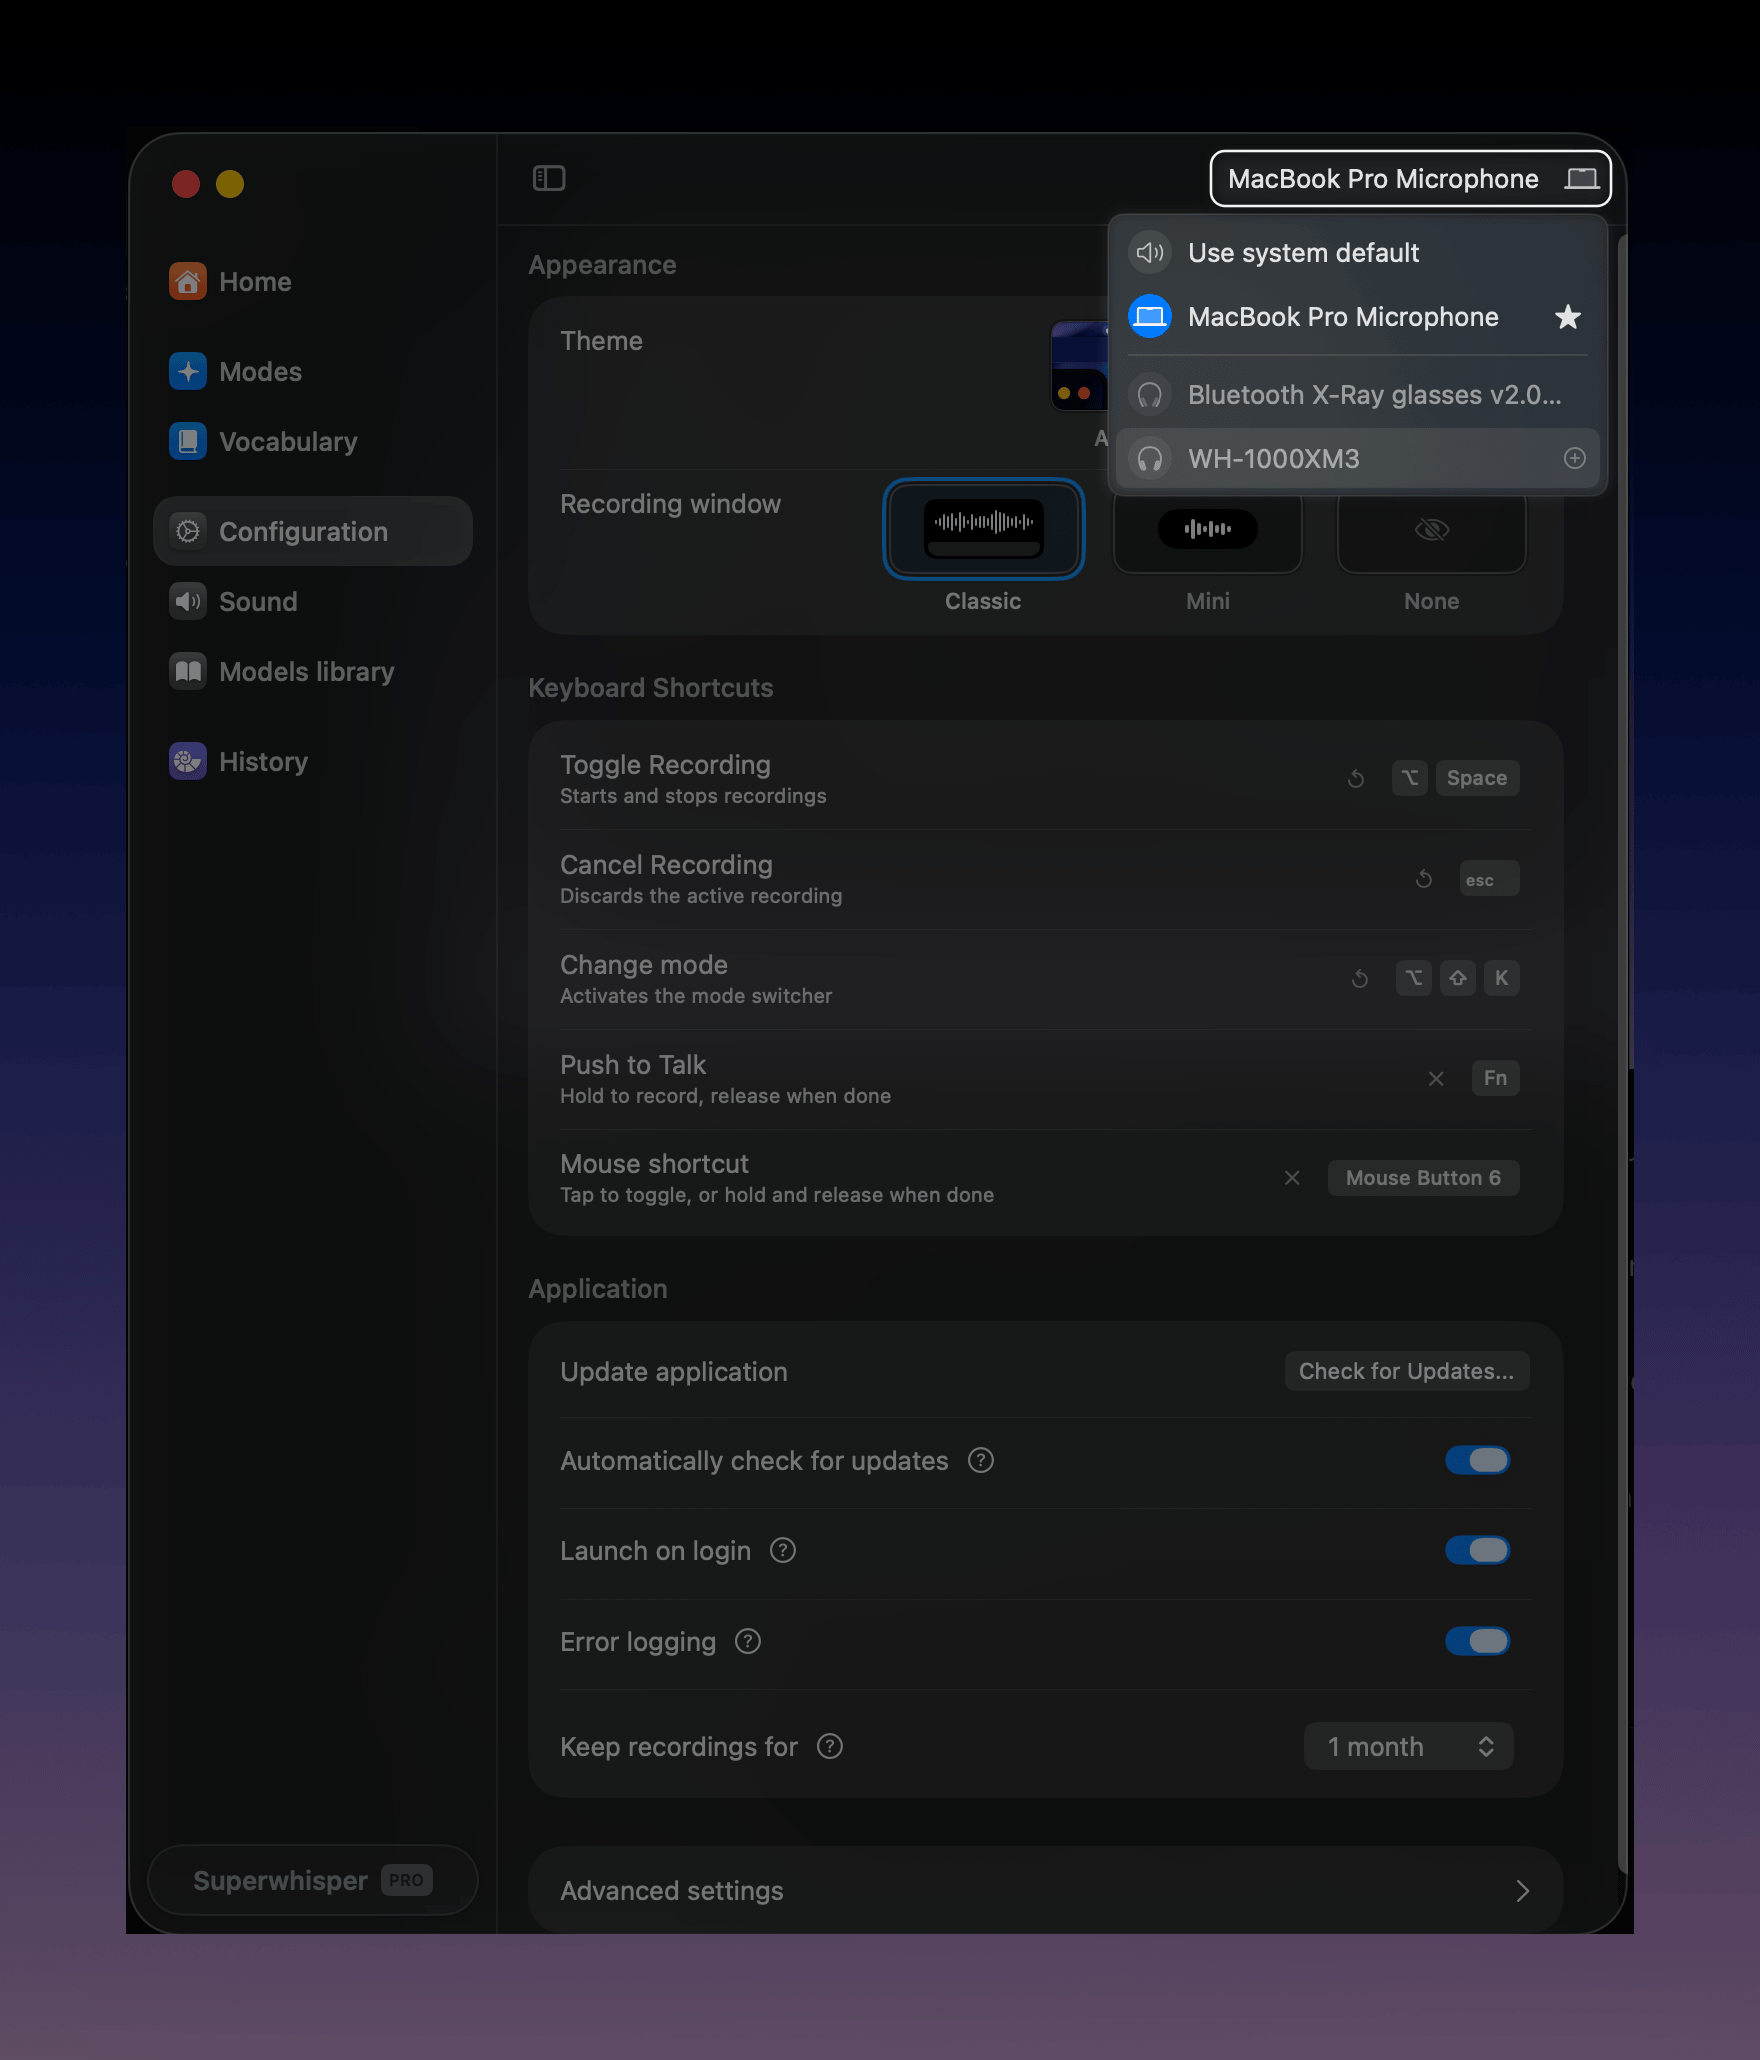
2
Confirm microphone permission
On macOS, open System Settings → Privacy & Security → Microphone and make sure Superwhisper is enabled. On Windows, check Settings → Privacy & security → Microphone.
3
Watch the waveform while you speak
Start a recording and talk. If the waveform doesn’t move, audio isn’t reaching the app. Try the built-in microphone to rule out a Bluetooth device problem.One exception: when a mode records system audio, the waveform stays still by design. Check History to confirm audio was captured.
4
Play back the recording
Open the dictation in History and play the audio. If the recording is silent, the input device was wrong or muted. If you can hear yourself clearly but still got the error, report the recording from History. It sends the audio to the team with your report.
Check that Automatically increase microphone volume is on in Settings → Sound. It sets the microphone input volume to maximum when a recording starts, so quiet input is less likely to read as silence. It works only when Superwhisper uses the system default device.
Stuck on processing
If dictations hang at the processing stage instead:- Check your connection: Cloud models need internet. Try a local model to confirm.
- Check the model finished downloading: A local model that’s still downloading can’t transcribe. Open Settings → Models library.
- Restart Superwhisper: retry the dictation from History. Your audio is already saved.
- Report it: turn on Error logging in Settings → Configuration, reproduce the problem once, then report the recording from History.