

File transcription is a Pro feature. Without Pro, Transcribe File… in the menu shows a lock icon. See plans.
Overview
Superwhisper can transcribe external audio and video files: meeting recordings, lectures, interviews, voice memos, and more. The file processes through your currently active mode, so the result uses that mode’s voice model and AI formatting.For the best results, use:
- MP3 audio files
- MP4 or MOV video files
- Opus audio files (Windows)
- Mono WAV files with a 16 kHz sample rate
Transcribe from the menu bar
1
Verify the active mode
Make sure your preferred Superwhisper mode is active
2
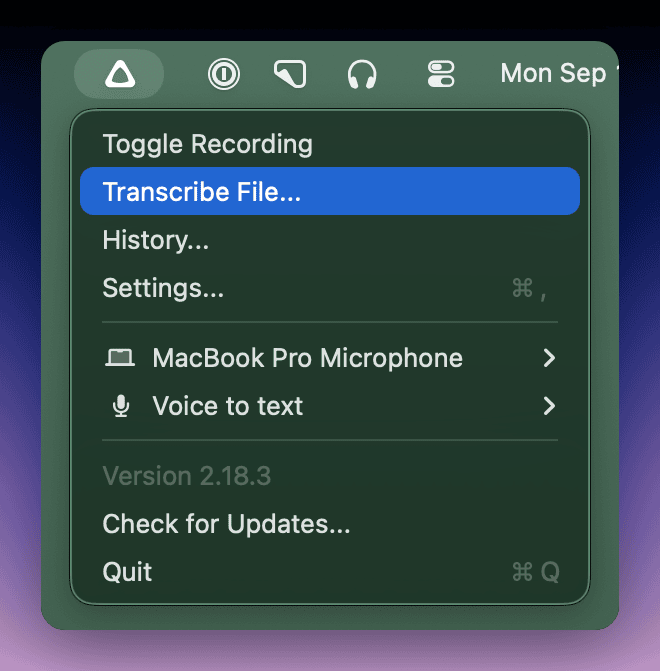
Open the menu
Click Superwhisper’s menu bar icon
3
Select Transcribe File...
Choose Transcribe File… from the menu
4
Choose the file
Browse and select the audio or video file to transcribe
On Windows, click the Superwhisper tray icon and choose Transcribe File. You can also right-click a file in File Explorer and choose Transcribe with Superwhisper (under Show more options on Windows 11) or Open with → Superwhisper. The two methods below are macOS only.
Transcribe from Finder (macOS)
1
Locate the file
Find the audio file in Finder
2
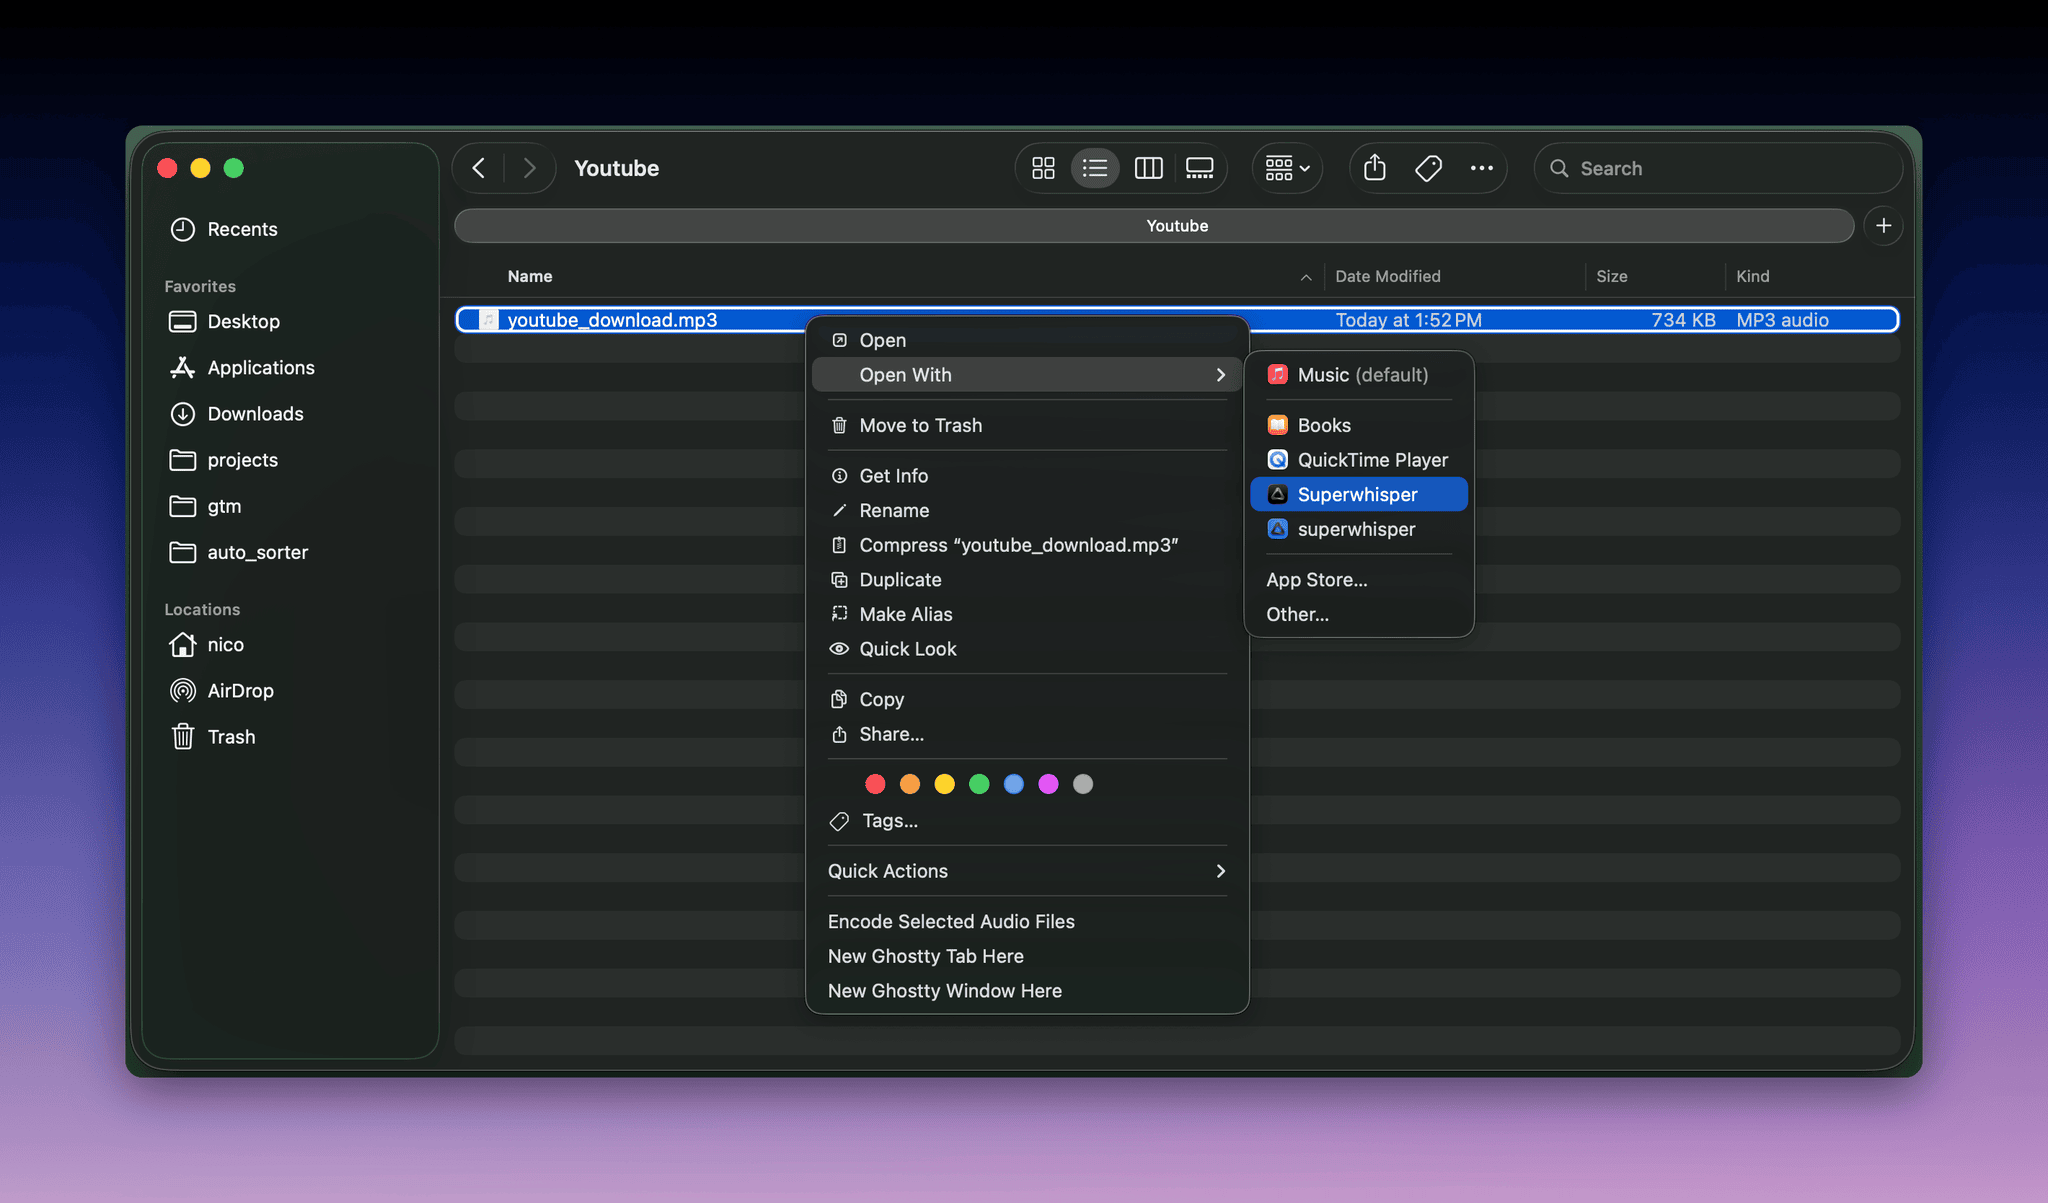
Right-click it
Right-click the file to open the context menu
3
Open with Superwhisper
Select Open With → Superwhisper
- If Superwhisper isn’t listed, choose Other and select the application